


© 2026 New Orleans Handyman, LLC. All Rights Reserved.
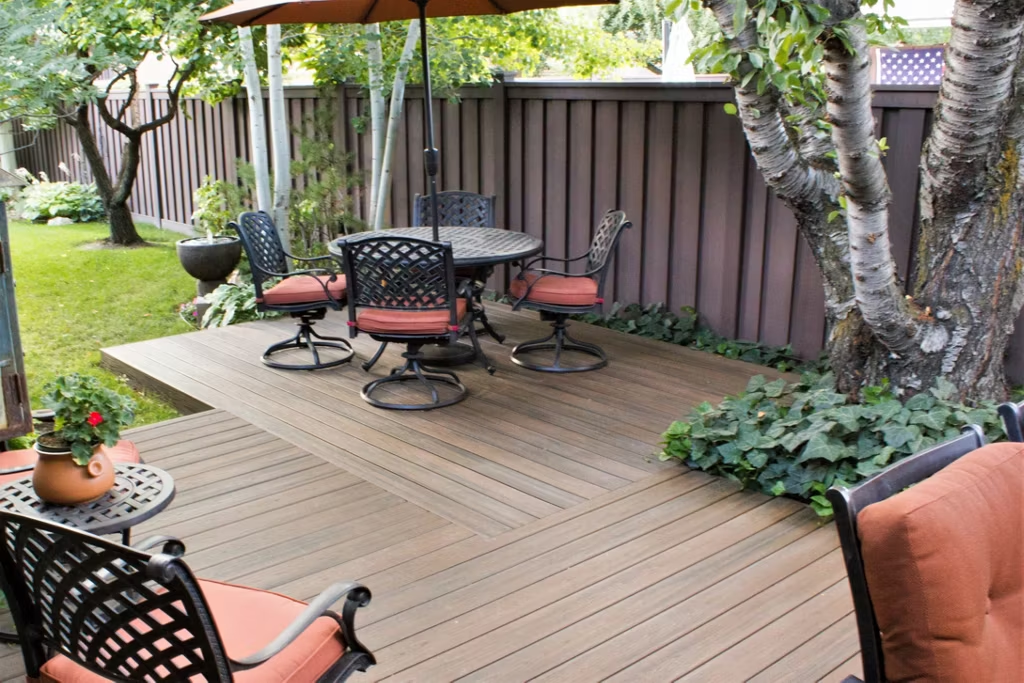
If you are looking for practical ways to boost your home’s value in New Orleans or Metairie, do not overlook your outdoor space. A well-designed deck and professionally installed fence can transform your property—both visually and financially. In South Louisiana, outdoor living spaces are especially valuable thanks to our long warm seasons and backyard-focused lifestyle. Whether you are planning to sell your home or simply improve your outdoor living area, the right deck and fence upgrades can deliver long-term value. Why Deck and Fence Upgrades Matter in New Orleans & Metairie Homeowners in Metairie, Lakeview, Uptown, Old Metairie, and surrounding New Orleans neighborhoods are investing more in outdoor upgrades than ever before. Buyers want homes with functional, attractive outdoor spaces they can enjoy year-round. A professionally built deck and fence can: Increase property value Improve privacy and security Enhance the outdoor entertaining space Boost curb appeal Help withstand the Louisiana weather when built with proper materials Working with experienced local contractors like New Orleans Handyman ensures your deck or fence is designed for our climate and built to last. Upgrade to a Modern Deck Design An outdated deck can drag down the look of your entire backyard. Upgrading to a modern deck instantly improves the appearance and functionality of your outdoor space. Popular deck upgrades for New Orleans-area homes include: Composite decking for low maintenance in humid climates Multi-level decks for larger backyards Built-in seating for entertaining Outdoor lighting for safety and ambiance Add a Privacy Fence Privacy fences are one of the most requested upgrades by homeowners in Metairie and New Orleans, especially in neighborhoods with smaller lot sizes. Popular privacy fence options include: Cedar wood fencing Pressure-treated pine fencing Vinyl fencing Horizontal modern privacy fences Enhance Curb Appeal with Decorative Fencing If privacy is not your top priority, decorative fencing can add major curb appeal. Popular options include: Picket fences for traditional New Orleans charm Aluminum fencing for upscale modern aesthetics Horizontal wood slat fencing for contemporary homes Choose Materials Built for Louisiana Weather Because of the heat, humidity, rain, and storms common in South Louisiana, material selection matters. Recommended durable materials include: Composite decking resistant to moisture and rot Pressure-treated lumber rated for exterior use Cedar fencing for natural rot resistance Vinyl fencing for low maintenance Add Functional Outdoor Features Boost your backyard’s usability with upgrades like: Pergolas or shade covers Deck railings with integrated lighting Secure locking gates Built-in planters or bench seating Improve Safety and Security A sturdy fence and properly built deck improve safety by: Keeping children and pets secure Preventing falls with proper railings Ensuring structural stability during storms and heavy use Refresh Existing Decks and Fences If replacement is not needed, simple updates can still add value: Power washing and staining Replacing damaged fence pickets Repairing loose railings Swapping rotten deck boards Hire a Local New Orleans / Metairie Deck & Fence Contractor Large deck and fence projects require proper planning, permitting knowledge, and installation expertise. At New Orleans Handyman, we provide expert deck and fence installation throughout Metairie, New Orleans, Kenner, Harahan, River Ridge, and surrounding areas. Final Thoughts Deck and fence upgrades are smart investments for homeowners in New Orleans and Metairie. Whether you want to improve privacy, boost curb appeal, or create a better outdoor entertaining space, the right upgrades can significantly increase your home’s value and enjoyment.

If you’ve been thinking about updating your home, there’s a design trend getting a lot of attention right now: accent doors. For years, accent walls were one of the most popular ways to add color and personality to a room. But homeowners and designers are starting to shift toward something more refined and architectural. Instead of painting one wall a bold color, many are choosing to make a statement with a beautifully finished interior or exterior door. At New Orleans Handyman, we help homeowners improve the look and function of their homes with door installation, repair, painting prep, trim work, and hardware upgrades. If you’re looking for a simple way to add style without a full remodel, an accent door may be the perfect upgrade. What Is an Accent Door? An accent door is a door that stands out from the rest of the room through color, finish, style, or design detail. It could be a pantry door painted deep green, a matte black office door, or a bright interior door that adds contrast to a neutral space. This trend works because it adds visual interest without overwhelming the room. Unlike an accent wall, which can divide a space, an accent door feels intentional and tied to the architecture of the home. Why Homeowners Are Choosing Accent Doors Adds a pop of color without taking over the room Creates a clean focal point Works in both modern and traditional homes Highlights the shape and character of the door Feels updated without requiring a major renovation Accent doors are especially appealing for homeowners who want something stylish and current, but still timeless enough to work with the rest of the home. Best Places to Use an Accent Door One of the best things about this trend is that it works in many different parts of the home. Some of the most popular places to use an accent door include: Front entry doors Office doors Pantry doors Bedroom doors Closet doors French doors Laundry room doors Doors with glass panels, decorative trim, arched tops, or double-door designs can make an even bigger impact. Popular Accent Door Color Ideas If you’re not sure where to start, here are a few accent door color ideas that work well in New Orleans homes: Deep blue for a classic but bold look Forest green for warmth and richness Matte black for a clean, modern feel Muted sage for a softer, natural look Dusty blue or clay tones for a subtle but custom touch You can also keep things more understated by painting only the edge of the door or using a different finish than the surrounding trim. Should You Paint the Door Trim Too? That depends on the look you want. Door only: creates contrast and keeps the design simple. Door and trim together: creates a more dramatic, built-in look. Both options can look great when done well. The right choice depends on the style of your home and how bold you want the finished result to feel. Why Accent Doors Work So Well in New Orleans Homes New Orleans homes are full of character. Whether your home is historic, traditional, transitional, or modern, an accent door can help highlight that personality instead of covering it up. This trend works especially well in homes with: Original trim details Tall ceilings French doors Historic architecture Neutral interiors that need a focal point How New Orleans Handyman Can Help At New Orleans Handyman, we help homeowners with: Interior door installation Exterior door replacement Door repair and alignment Trim and casing updates Hardware replacement Painting prep and finish-ready repairs If your door is sticking, damaged, outdated, or just needs a fresh new look, we can help you get it ready for an accent door makeover. Final Thoughts If you want an easy way to refresh your home, accent doors are one of the best design upgrades to consider. They add color, character, and style without the commitment of repainting an entire room. Thinking about upgrading a door in your home? Contact New Orleans Handyman for help with door installation, repairs, trim work, and more. Contact New Orleans Handyman today to get started.
Living in New Orleans means your home faces unique challenges — humidity, heavy rain, termites, heat, and storm seasons all put stress on houses year-round. The good news? Many expensive repairs can be avoided with simple preventative maintenance. Below are 10 small repairs that can save New Orleans homeowners thousands of dollars if caught early. 1. Seal Exterior Gaps and Cracks Small openings around windows, doors, or siding let moisture, pests, and humid air inside. Over time, this can lead to mold, rot, or insulation damage. Quick fix: Exterior-grade caulk or sealant once a year. 2. Repair Window Glazing Cracked or missing glazing lets water seep into window frames, causing wood rot and interior damage. Reglazing is inexpensive compared to full window replacement. Tip: If glazing is brittle or falling out, it’s time for repair. 3. Tighten Loose Porch Railings Porches are common in New Orleans homes, especially raised or historic ones. Loose railings aren’t just unsafe — they also allow moisture into joints that can rot structural wood. 4. Replace Damaged Fence Boards Broken pickets or leaning sections allow wind to catch the fence and worsen damage during storms. Fixing one board now can prevent replacing an entire panel later. 5. Patch Small Drywall Holes Tiny holes from door knobs, hardware, or minor impacts allow moisture and pests to enter wall cavities — especially in humid climates. Simple patching keeps insulation dry and walls intact. 6. Fix Dripping Faucets or Leaks Even a slow drip can lead to cabinet swelling, mold growth, or floor damage. In Louisiana humidity, moisture problems escalate fast. 7. Secure Loose Trim or Siding Loose exterior trim acts like a funnel for rainwater. Water intrusion behind siding can cause structural wood rot and termite attraction. 8. Clean and Repair Gutters Clogged gutters cause water to overflow against fascia boards and foundations. In New Orleans’ heavy rainstorms, this can quickly lead to foundation issues or roof edge rot. 9. Repair Door Seals and Threshold Gaps Poor door seals allow: humidity insects heat water Replacing weatherstripping is one of the cheapest and most effective repairs you can make. 10. Address Minor Wood Rot Immediately Small soft spots in trim, railings, or fascia boards can spread quickly if ignored. Early repair often means sanding, filler, and sealing — instead of full replacement later. Why Preventative Repairs Matter More in New Orleans The Gulf climate accelerates wear and tear compared to most regions. Moisture + heat + storms = faster deterioration. Homeowners who stay ahead of small issues often avoid major structural repairs. Quick Seasonal Checklist Every 3–6 months: Inspect windows and trim Check fence stability Look for soft wood spots Test door seals Inspect gutters When to Call a Handyman If you notice: cracking paint or wood soft trim loose railings gaps around doors/windows moisture stains …it’s best to fix them before they become major repairs. Need Help With Preventative Repairs? Professional maintenance can catch issues most homeowners miss. A quick inspection and minor fixes today can save you from large repair bills later. 👉 Contact New Orleans Handyman for a preventative home repair checkup
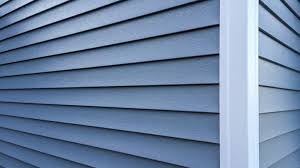
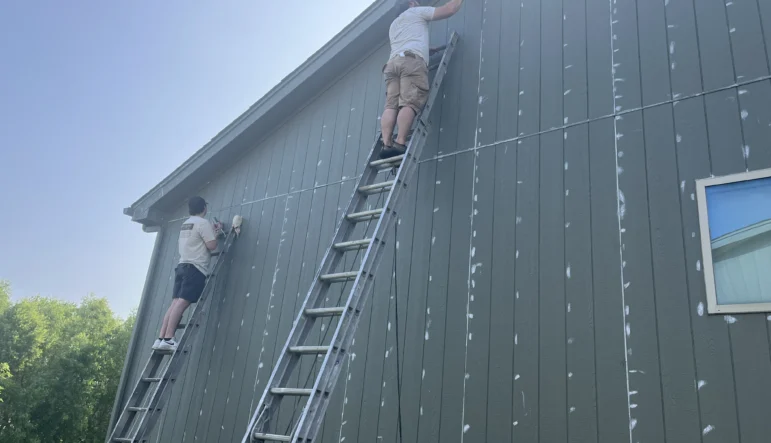
Your home’s siding isn’t just there for looks—it’s your first line of defense against the elements. When siding begins to crack, warp, or buckle, it’s more than just an eyesore. It’s a red flag that your home may be vulnerable to water damage, insulation issues, or even pest infestations. If you’ve noticed these problems, don’t ignore them. The sooner you address siding issues, the more you’ll save in repairs and energy costs. At nohandyman.com, we help homeowners spot, solve, and prevent damage—without the headache of DIY. 🔍 What Causes Siding to Crack or Warp? Several factors can damage your siding over time: Extreme temperature changes causing expansion and contraction Moisture infiltration behind the siding Poor installation or low-quality materials Aging and general wear and tear Pest damage from termites or rodents Regardless of the cause, cracked or warped siding is a signal that your home needs professional attention. 🚨 Why It Matters: The Risks of Ignoring Siding Damage Ignoring damaged siding can lead to: Water damage and mold growth inside walls Higher energy bills due to poor insulation Structural damage to the framing of your home Reduced home value and curb appeal Costly repairs that snowball over time The team at nohandyman can inspect the damage and recommend smart, affordable fixes before the problem worsens. 🛠️ Repair or Replace? What to Do Next Not all siding damage means full replacement. In many cases, targeted repairs or partial panel replacements can restore your home’s protection and appearance. A professional assessment can determine whether a quick fix will do the trick or if larger-scale work is needed. At nohandyman.com, we make it easy to schedule a siding inspection and get honest recommendations—no pressure, no upselling. 💡 Prevent Future Damage To protect your siding year-round: Keep gutters clean and functioning properly Trim nearby trees and bushes Pressure wash annually to remove mold and debris Look for early signs of warping or cracking Routine maintenance with nohandyman can extend the life of your siding and catch problems early. ✅ Final Thoughts Cracked or warped siding isn’t just cosmetic—it’s a sign your home might be at risk. Whether you’re dealing with minor wear or major damage, the pros at nohandyman.com are here to help you protect what matters most. Book your inspection today and keep your home safe, dry, and beautiful.
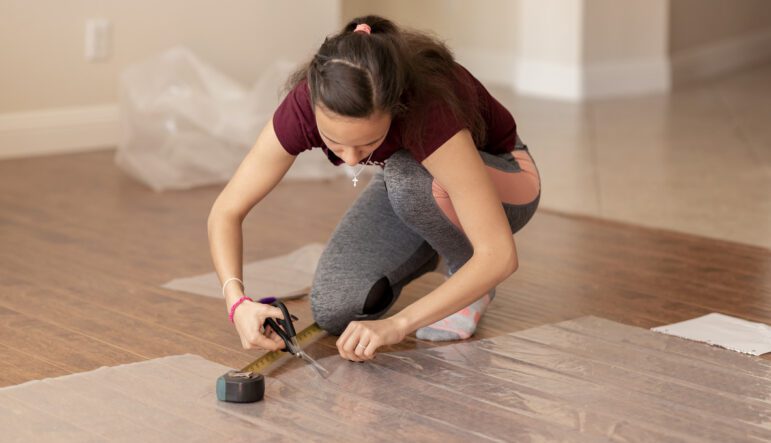
Floors take the brunt of your everyday life—foot traffic, spills, furniture, pets, and everything in between. But while they may seem sturdy, flooring issues can creep up quietly. Whether you’re dealing with creaks, cracks, water damage, or soft spots, delaying repairs could lead to much costlier problems down the road. At nohandyman, we specialize in identifying early signs of floor damage and helping homeowners fix or replace flooring before the costs—and hazards—pile up. ⚠️ Common Signs Your Floors Need Attention If you notice any of the following, it may be time to repair or replace your flooring: Visible cracks or splits in wood or tiles Uneven or sagging sections of the floor Soft spots or spongy feel underfoot (especially in wood or laminate) Creaking or loud sounds when walking Water stains, warping, or discoloration Loose or chipped tiles, or peeling laminate These may seem minor at first, but they often signal deeper structural issues like subfloor damage or water infiltration. 💸 What Happens If You Wait Too Long? Putting off flooring repairs can cost you more than just peace of mind: Higher repair or full replacement costs later Increased risk of injury from tripping hazards Moisture damage to subfloors, walls, and insulation Decreased home value and appeal Mold and mildew growth, especially in water-damaged areas Letting flooring issues linger can also impact your home’s air quality and overall safety. At nohandyman.com, we believe in fixing it right—before it becomes a bigger problem. 🛠️ Repair or Replace? Here’s What to Expect Minor Repairs: Replacing a few tiles, sanding down wood, or fixing trim – affordable and quick. Moderate Repairs: Subfloor reinforcement or patching up water-damaged areas – mid-range cost and labor. Full Replacement: New hardwood, tile, or vinyl – higher upfront cost but improves durability, aesthetics, and resale value. Not sure what you need? Schedule an inspection with nohandyman and get expert advice without the pushy sales pitch. Prevent Future Floor Trouble Avoid expensive repairs by maintaining your floors regularly: Use rugs in high-traffic areas Clean spills immediately Monitor moisture and humidity levels Schedule annual inspections with a pro With nohandyman, floor care becomes easy, reliable, and affordable. ✅ Final Thoughts Ignoring flooring issues won’t make them go away—it’ll only increase the cost and risk. From minor repairs to full replacements, trust nohandyman to help you protect your home from the ground up. Don’t wait for a small creak to turn into a big bill. Book your floor check today.